Sorry, the free downloader time has expired. You can download the file without any ads with Premium account!
Login
Render Raw v1.1.3 Plugins for Blender Free Download
what is Render Raw v1.1.3 ?
The advanced color workflow in Blender is far from straightforward or intuitive, which leaves some artists unsatisfied with their results. Read on to discover why this is the case and how Render Raw will save you hours of work and can get you better-looking renders with just a few clicks.
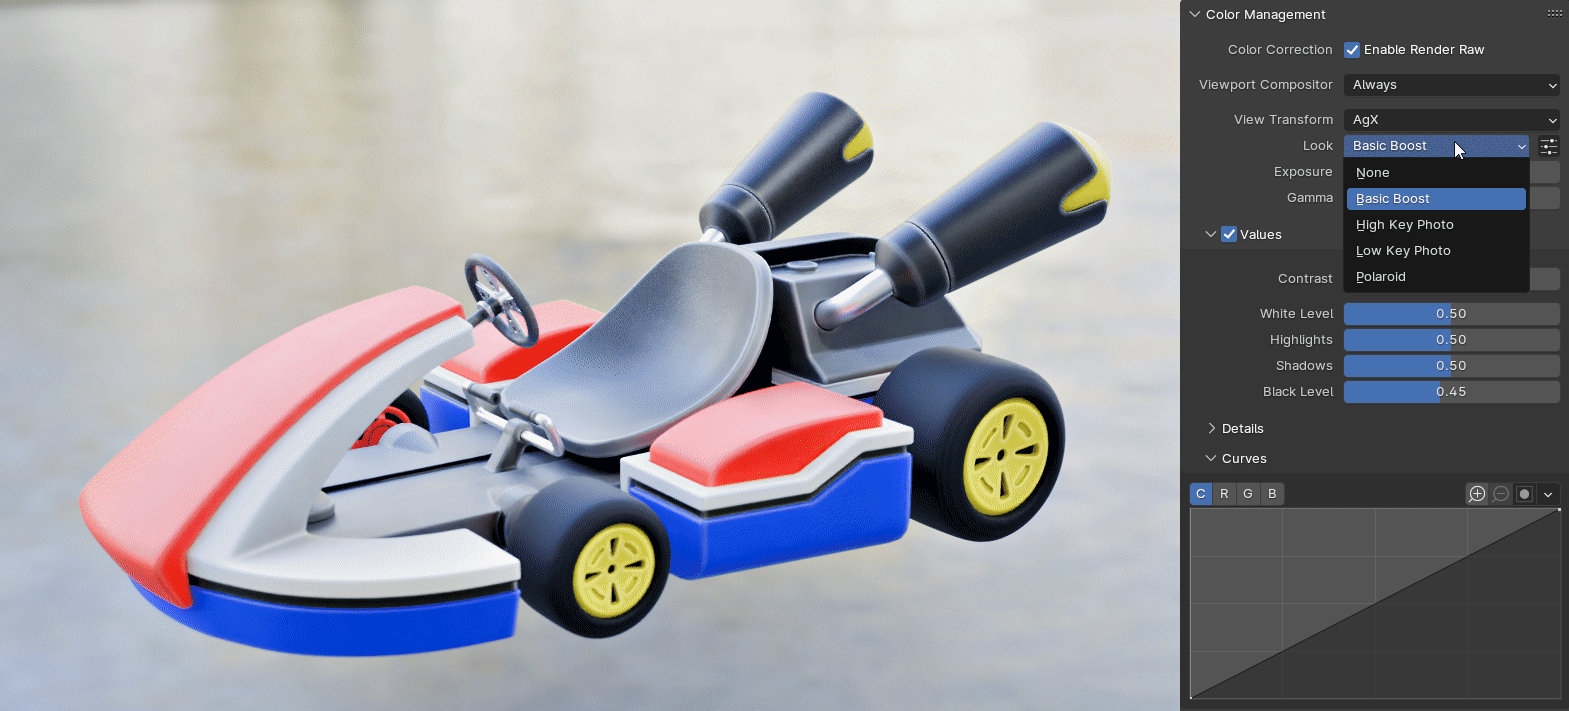
Features: Values
Of course, you'll have access to Exposure, Gamma, and Contrast just like before, but with Render Raw you'll also find sliders for fine tuning the White, Highlight, Shadow, and Black levels. Details can be brought out of the values using Sharpening, Texture, and Clarity controls. There is also a panel for Curves, and they behave as expected (mapped to the 0-1 range) unlike Blender's default AgX curves (mapped from 0 - infinity).
Colors
In the colors panel, you'll find Temperature, Tint, Color Boost, & Saturation controls, as well as adjustments for Hue per Hue, Saturation per Hue, Value per Hue, & Saturation per Value, and a panel for coloring Highlights, Midtones, and Shadows using any blend mode.
Effects
I couldn't resist also adding some fun effects that I use all the time! To help emulate a real camera, Render Raw offers quick access to Lens Distortion, Dispersion, Vignetting, Glare, and Film Grain. The film grain is a big improvement over most apps' implementations since it's applied in proportion to the amount of light and the Accurate method displaces the image to fit the grain rather than just overlay a texture. The bloom is also custom built so that it supports transparency and what you see in the viewport actually matches what you get in the render.


